Skipping the Cobalt Translator
Discovered by
SkippyJr, Flamancipator, DJ Grenola
There is only one essential door in Echoes that is protected by a cobalt lore; that which connects Sanctuary Temple to Workers' Path, via which the Spider Guardian is reached. To skip the Cobalt Translator it is necessary to bypass this door using secret world techniques, as skipping the Spider Ball outright is not believed to be possible. This secret world sequence needs to be performed twice; once to get the Spider Ball, and then again later on to get the Sky Temple key that lies beyond the Power Bomb door in Dynamo Works.
Both map exit points used in this sequence are so-called screw attack secret worlds, which exploit a clipping bug related to the use of the Screw Attack in very tight spaces to pop Samus out of the level. Because of this, it is necessary to collect Screw Attack before Spider Ball by means of the Watch Station Access dash followed by the instant-morph bomb slot trick (see Early Screw Attack); Screw Attack therefore becomes the first item to collect in Sanctuary Fortress. Once you have Screw, head back to Sanctuary Temple, where the fun begins.
Phase One
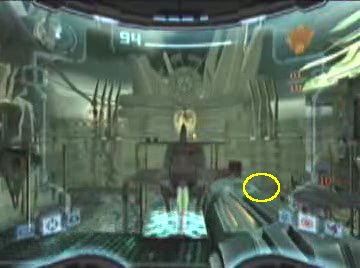
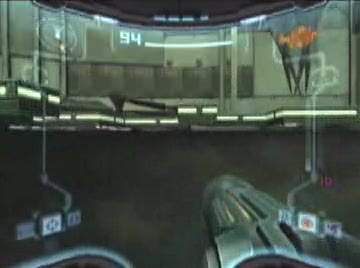
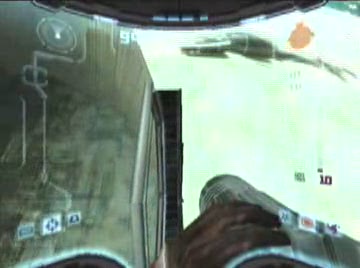
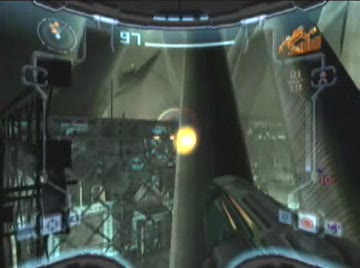
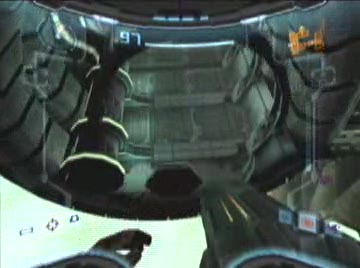
The method used to leave the map in Sanctuary Temple involves screw attacking one of the unfinished robot legs lying around on the floor. You will enter the Temple via Temple Access after having collected Screw, in which case you want the robot leg in the far right hand corner of the room, directly under the long vertical bars to the right of the high door that leads to the Energy Controller:
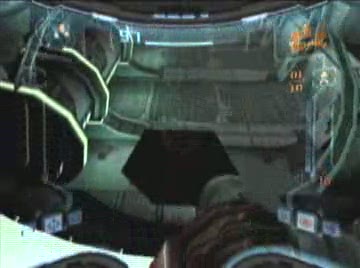
You need to stand between the leg and the wall and target the screw attack slightly to the right of the point where the leg meets the wall. Initial position before attempting the screw attack seems pretty crucial. There is basically only one point you can stand in that allows you to get the SW consistently - start anywhere else and you either won't be close enough, will be too close, or Samus will bang her head on something and be nudged sideways. The easiest way to get the position right is by using the Morph Ball and lining Samus up using the pattern on the floor:
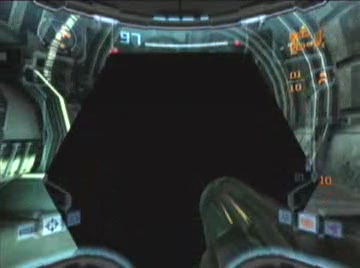
That is about the perfect spot. Unmorph and align yourself for the Screw Attack; you should now be looking at something like this:
Now you need to jump straight up once, Space Jump straight up again, and at the very last second before touching the ground again push forward and B to Screw Attack the leg. The aim is to actually get inside the leg, which looks like this:
Sometimes this goes wrong and the game morphs you, other times it just doesn't work. It can be nailed with some consistency though once you know exactly where you're aiming, so it isn't just pure luck. You can of course not bother using third person view for alignment and just trying to position yourself purely by eye if you're going for speed, but that's probably harder than it looks. Once you're inside the leg, you need to try to actually work yourself through the leg, into and through the wall of the Temple. Hold L and wiggle the stick between left and top-left; after three or four wiggles you should pop through the wall.
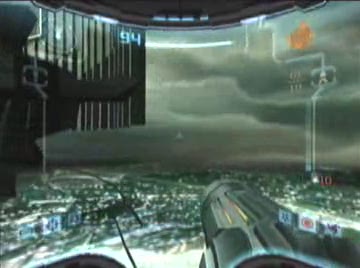
Now you need to make your way over to the opposite side of the Temple. You want to end up to the left of the structure that holds up the platform that you would stand on to reach Workers Path and the Spider Guardian (there's another robot leg there), so you can climb up the wall to the left of the cobalt gate. There's no voodoo here, just walk over there from under the floor.
Screenshot
Once you get close to the wall of the Temple you need to be careful; walk an inch too far and you'll fall way below the level and have to either float or reset. You want to be standing outside the Temple wall, but only just. It's easiest to turn sideways and look at the wall end-on, and then strafe until you're standing just beyond it. This picture probably doesn't help much.
Screenshot
From here, turn so Samus is facing the inside of the temple again. Now press B repeatedly. Nothing will happen at first, but within a couple of seconds you should jump and space jump. Be careful not to activate the Screw Attack. Once you're above the level of the floor, push forwards into the wall of the temple, where Samus should stick.
Now morph and continue to hold into the wall. The next task is to infinite bomb jump up the wall. You can do this by just holding forwards into the wall for the whole thing and laying bomb after bomb, but this is slow and each jump won't carry you very far. A better technique is to release the stick to the centre position as each bomb goes off and then immediately push back into the wall once you reach the peak of the jump, which will give you full height for all your bombs. After a while (10 or 15 bombs) the wall of the Temple begins to slope inwards, so from this point on you can just hold forwards all the time and keep bombing; there's no need to centre the stick any more.
There is a fairly obvious section of graphics which you should unmorph onto once you've laid 20 or so bombs. If you're interested in doing this trick more quickly, it may be possible to unmorph sooner than this and find a quicker way past the cobalt door, but doing it this way guarantees consistency.
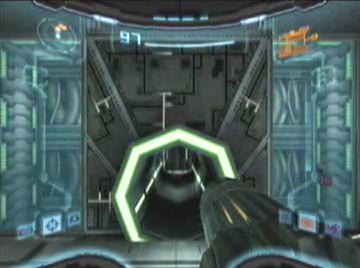
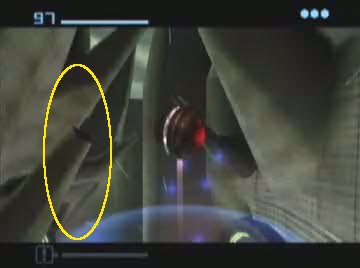
From that position, if you lay one more bomb and unmorph at the peak, you should be higher than and to the side of the cobalt door you're trying to bypass. If you turn about 45 degrees to the left, hold L and wiggle the stick between left and top-left you will fall a short distance and be standing on a sticky section just in front of the cobalt door. Morph again. From this position, you should be looking at something like this:
Now just bomb jump onto the top of the cobalt door. There are a set of studs on the top of the door that protrude through the scenery; if you bomb jump into the centre of one of these and unmorph you should find that you can jump normally (everywhere else on top of that door is sticky, but the studs are standable). From here you need to jump onto the top of the normal blue door beyond the translator gate. A single jump is the cleanest way; you shouldn't need the space jump.
This is all standard wallcrawling; shoot the door so it changes colour, hold L and strafe right towards Workers Path, press B to jump. Workers Path should load (just try it again if it doesn't work). Shoot the door again, jump backwards off the door with your first jump and then forwards back onto the door with your space jump (this is the "door jump dump"). The object is to remove Sanctuary Temple from memory and leave Workers Path loaded. It can be a bit tricky to get the right room to stay in memory; often it is Workers Path that is unloaded and Sanctuary Temple that stays loaded. You can ensure consistency with this by making sure that you're on the Workers Path side of the door for the jump, but if you're trying to do this at speed it can be awkward with the sticky graphics around the door. If the wrong room disappears, just shoot the door again and do the strafe jump to reload it.
The object here, having passed the cobalt gate and loaded Workers Path, is to get back into the map. Terminal falls are your friend, and there are a bunch of ways to try to trigger the terminal fall in Workers Path to bring Samus back into the map. Speed runners should note that it is possible to fall off the door while trying to dump Sanctuary Temple and activate the terminal fall, which is a good ten to fifteen seconds quicker than other methods, but suffers a bit in the consistency department (sometimes the terminal fall doesn't work, and you just end up miles below the level like a lemon). Another way is to jump onto the scenery just in front of the door and wiggle about until you reach a standable spot (look for the screen to shudder slightly signifying that Samus has landed). From here you can strafe jump backwards/left and then forwards and push into the wall of Workers Path opposite the first floating platform, and use a technique dubbed abseiling (basically moving the stick forwards and backwards to lower yourself down the sticky wall in stages) to drop off the bottom of the map; three or four jerks should do it.
It seems that touching the wall in this way is enough to convince the game that once Samus drops off the bottom, the terminal fall should be activated. As was mentioned, other techniques for doing this are available, but this one is fairly attractive in terms of its consistency / speed tradeoff. Having said that, there is definitely room for refinement here; it should be possible to find a fast yet reliable way of getting the terminal fall to work right off the blue door.
Anyway you're back in the map now, so go fight the Spider Guardian and grab the Spider Ball.
There's a video of the whole first stage of the process here.
Phase Two
Once you've got the Spider Ball, you have to get out again. If you're not worried about percentage, you can just do this by grabbing the missile expansion and returning to the Main Gyro Chamber via Dynamo Access. If you're going for genuine low %, though, you can't collect that expansion, so you'll have to use another Screw Attack secret world to get out. This time, you need to screw attack one of the two morph ball holes that leads to the Spider Ball Guardian puzzle section; either the one opposite the power bomb door that ultimately leads to a Sky Temple key, or the one opposite the door you came in through. Obviously accessing the secret world from the power bomb door entrance is faster in some ways because it is not necessary to cross back across the whole room after collecting the Spider Ball. However, the objective once outside the map is to get into a "skywalk" above the map; a technique to do this from the power bomb door entrance was pioneered by Flamancipator (it involves walking along the inside of the pipe, morphing and bomb jumping up the face of the morph ball puzzle), but details are scarce; suffice to say it is very difficult, unreliable and you are at the mercy of a very tempremental camera. The alternative is to return to the entrance and access the secret world from there, which is more straightforward. Details of this easier method will now be outlined.
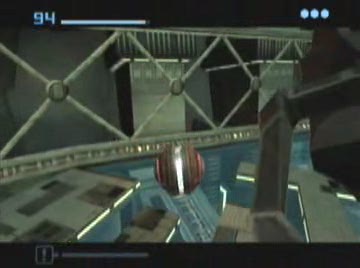
Start position is vital again; you should be standing here:
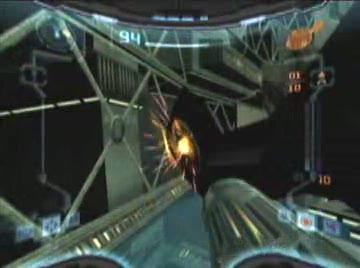
... and jump once, twice, and then push forwards and screw attack the morph ball hole at the last second. If done right, Samus should go right into the opening while still in screw attack mode. This SW is tricky and very annoying if you have just nailed a good Spider Guardian fight and are going for speed. There is also something of a double-edged sword about this method of leaving the map. If you screw attack and then don't touch the stick, you can fall right through the morph ball tube and end up stranded under the map. It is possible to combat this by strafing left as soon as you get into the secret world, in which case you will catch on one of the areas where the Spider Guardian is before the fight starts and not fall. Unfortunately, strafing left can also have the effect of popping you back into the level if the screw attack was not quite perfect. A possible compromise is to strafe forwards and left after the screw attack, instead of just left, which ought to do enough to catch Samus on the ledge, but at the same time help force her out of the level rather than back in. This is not an exact science though; experimentation is recommended, and you are warned that doing this at speed is pretty frustrating. You could also try strafing right, and see if you have any more luck that way.
Once you are standing on the ledge just to the left of the morph ball pipe, your first task is to get on top of the pipe using a space jump. Sometimes Samus' position is such that there are graphics blocking the jump, in which case you will need to look up and move about until you have a clear jump above you, but without falling off the ledge (all too easy). Also, beware of standing on the edge of the pipe; the game's engine will try to force you off, and you will probably just fall. You need to be right on top of it. Once you're on the pipe, morph and use a DBJ to get on top of the entrance area directly above the opening you just screw attacked. This is not straightforward either, thanks to the camera. Often, when the first bomb of the DBJ goes off, the camera will move so that a piece of scenery completely obscures your view of Samus. When this happens, it is important to remember that the camera is actually behind Samus, so even though you can't see her, pushing forwards and unmorphing will probably do the trick; don't push any other direction or you will just propel yourself off the pipe and fall.
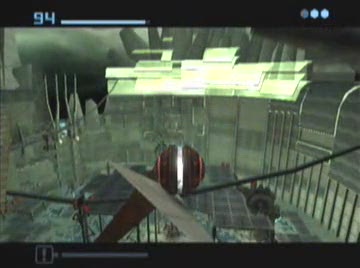
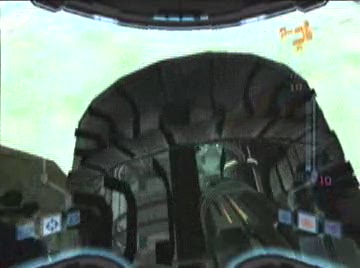
Assuming you made it to the roof of the entrance area, you now need to find a standable spot which will allow you to jump. You may be standing on one already. Don't press jump more than once, or you risk a screw attack, which can have disastrous consequences. If the first jump doesn't work, morph and do a single bomb jump unmorph onto the very edge of the entrance area nearest to the morph ball puzzle. This is guaranteed standable (you should hear the "clink" as Samus touches down - this always means you're standing on a solid bit). Face the puzzle end-on, and align yourself so you're opposite the middle of the "sandwich":
Rotate right so you're facing this position:
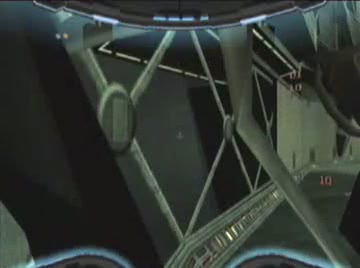
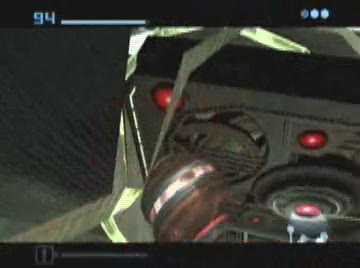
Jump straight out into space, space jump, and Screw Attack times 5. You are aiming for the piece of morph ball puzzle beyond the rock formation. You want maximum height and distance; it doesn't have to be perfect, but a half-baked effort is unlikely to make it. Screw Attack and out-of-map generally don't mix, but in this case (for some reason) it works. Exactly what happens once you hit the morph ball puzzle section is difficult to explain; the engine glitches a little, but when all is said and done you will end up inside a box in the morph ball puzzle section; sometimes you will be morphed, sometimes not. If not, morph now and push forwards into the wall. You won't be able to see Samus now because of the camera position, but that doesn't matter. Infinite bomb jump up the wall, using the same hold-and-release technique as was used in the Temple to speed things up. Keep holding forward once you emerge from the puzzle section and carry on going up. There are two reference points to your right and left; which one you can see depends on what the camera is doing, but you should always be able to see one or the other. The one on the left is a rock spire; the one on the right is a black pole. This picture shows the spire.
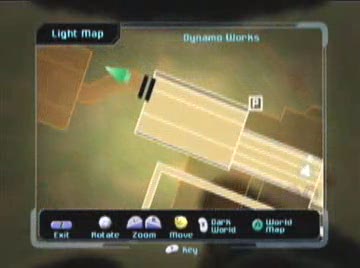
Somewhere around the top of these two reference points, you run out of invisible wall to bomb jump up, and you need to push forwards and unmorph. This takes a bit of practice; if you miss it and fall, push back into the wall as quickly as possible and jump back up to try again. When done correctly, you should be in a "skywalk"; you can just walk around on top of the map. Now you have to get back into the level using a door warp. This is probably easier to do using the black door that leads back to Dynamo Access and Main Gyro Chamber; however in a low % speed run your next target will be Torvus for the main Power Bomb, so rather than going back to Main Gyro you might like to try door warping using the blue door that leads to the elevator back to the lower level of Sanctuary Fortress and run to Torvus. Either way, you need to skywalk into a position above and just beyond the door of your choice. Here we assume you're going back to Main Gyro.
You need to make sure you're a little way past the door you're planning to use before you begin descending from the skywalk. Don't get too close, or you'll trigger the room loader too early. The map picture above shows a good position. Face the door, and use the morph ball to drop down in stages until you're at a level that is above the door. Don't stay morphed for too long unless you know what you're doing - the 'ball accelerates very quickly, so if you stay morphed too long you'll fall past the door. Keep unmorphing and checking your height.
The second picture shows the ideal position. Now you need to load Dynamo Access. Timing is everything here. Walk forwards onto the top of the door and listen to the gamecube. You should hear it begin to load Dynamo Access. You need to wait perhaps one and a half or two seconds while it loads part of the room. Walk backwards off the door and morph immediately, fall a short distance so that you are at a point that is inside the room. You need to fall far enough to get through the room's ceiling, but not far enough that you fall through the room's floor. Unmorph as soon as you have fallen far enough. If done right, you should be standing on the invisible floor of Dynamo Access (it looks like this):
There are basically two ways this can go wrong. If you wait too long on top of the door before backing up and morphing, the room will be completely loaded already and you won't be able to pass through the ceiling. If you don't wait long enough, the floor won't be there to support you when you unmorph, and you'll just fall. Other ways to mess this up include getting stuck on the graphics above the black door and being unable to get into the room in time (this tends to happen if your initial height wasn't right), and falling too far while morphed so that the engine just pushes you through the floor when the room finishes loading.
From here, just walk up to the door and press yourself against it; the room's graphics will magically appear around you, and you're back in the map.
There's a video of the second part of this little adventure here.