Metroid Fusion 1% Run
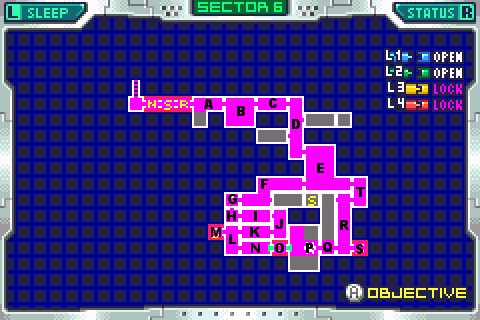
Behold the mighty reference map, and all it's glory.
To ARC
Ah, puffers. This is one of the segments that took forever. Not forever like Mega X took, because that was just practicing and honing skills. This is the bad kind of forever, the kind that depends on getting the right random factors.
You may be wondering why I made this its own segment. The answer is, quite simply, that to go back to the nav room from mega x quickly, without slowing down, requires not just a lot of skill and planning but also a lot of luck. The reason for that is the puffers. And doing this segment well would just be too difficult after getting a good mega x fight, which if you saw the strategy I used there, was also something that wasn't a cakewalk.
This kind of breaks the trend of "going to boss, fighting boss" that I was hoping to establish, but let's face it, that trend is going to be getting broken anyways. It's a long time until another boss, and even if you consider the wide beam eyeguy in PYR to be a boss, I won't be able to save before it. So I figured what the heck. This run already has a whole lot of segments for the purpose of being really perfect looking, so having NOC be 3 segments is hardly out of line.
This is also the first time that the walk back from a boss was so chalked full of random factors. And you know how much I hate those, and how much trouble they can cause me. Puffers.
Puffers are those little blue balls with purple things sticking out, they float around, and when you shoot them, they puff air out around them that, if you touch, will hurt you. They're also, amazingly, a monster I remember the proper name of. Though even if I didn't know they were actually called puffers, that's probably what I'd call them.
You can see why they'd be hard to get by without stopping or getting hit. Oh yeah, one more thing.
By now you're aware of how when you enter a room, enemies will start in the same location, but will move in a random direction. Most montsers have one of two directions they can randomly move in. Your puffer, however, has one of 4. Puffers always move diagonally, and any one of them can move down/right, down/left, up/left or up/right. Which means for every puffer, I have to either hope and pray for a good random movement, or I have to come up with contingent plans for as many puffer possibilities as possible.
Now you can see why I made this it's own segment. There's actually only a couple of rooms that are a real problem. So grab a sandwich and get comfy, cause I'm going to explain to you everything I learned about each and every puffer.
R: Well, in a minute. First we gotta get up this thing. And the marvelous technique I came up with for that was, well climbing. Sesshoumaru's Law says to avoid ladders whenever possible, but I don't think it's possible here. You can't wall jump up, and you certainly can't get a spark here. You CAN wall jump for a moment against where the wall gets closer, but it's so far away and you gain so little height, that it's just as fast to climb, believe it or not.
At the top you can wall jump off the side of the left ledge to skip the last bit of ladder. Use the stalagtite on the left there as vertical reference for when you're high enough to do that.
Make sure to land on the leftest part of the ledge, as time in the air is bad, time running is good. Remember your manners when you leave.
T: Ah, our first puffer. There's also a wormy on the right wall. At least this ladder you can wall jump. As always, use the background as reference for when you should jump. The charge is to take out wormy while you wall jump. But there's also a puffer here dying to ruin your day.
This is a random factor. There are no contingency plans that will get you by this puffer without getting hit or stopping for a minute. If you want to wall jump out with zero delay, you have a 50/50 shot, and you must restart if you don't get it. It's really quite simple: Puffer goes up, you will get hit. Puffer goes down, you continue on your merry way. Luckily this one is at the start of the run, so his 50/50 randomness ain't too bad. And we're on our way. Manners.
E: Hooray, no randomness in this room! It does take a bit of skill to get through fast, though. You have a spiky above you that you need to take out. Do like I do, jump then fire diagonally at him when you've cleared the ledge. Then a small hop to grab the next ledge, morph on through, unmorph in midair and grab the next ledge, then roll on through.
Now this is kinda tough, if you get far enough left, so just the tip of the morph ball is in the morph ball tunnel, you can jump and go straight up along the wall. Make sure to come to a full stop before trying this. If you're holding left when you jump, you'll fly away from the wall, and won't be able to grab the ladder.
Anyway, if you successfully spring straight up against the wall, unmorph and hit right to grab the ladder for only an instant, then jump left, wall jump right and another wall jump left. Shoot when at the breaky block to destroy it, and grab the ledge and run on through. Make sure to missile the spiky that's ahead of you when you come to it. Mustn't slow down. And Manners.
D: It's going to be a lot worse going up this place than it was going down.
The first problem is going to be the spiky tike right above where you want to be going. If he moves left, be happy, it's like he's not even there. If he moved right, you're going to need to shoot him before grabbing the ledge. He should be directly above you during you jump. It is possible, with some practice, to fire directly up at the height of your jump and quickly grab the ledge on the right on the way down.
If you had to shoot him, make sure to recharge, as there's a spiky tike on the right wall that you're going to need to spin-kill, because you're going to wall jump off that wall. You're going to wall jump off that wall pretty high, in fact, but not too high, cause you want to hurry and get on with this room. There's a reason you need to go as fast as utterly possible, other than the obvious. I'll mention that later though.
Now there's one condition where you won't be using a charge spin jump to kill this second spiky tyke. If he moved down, and you had to use your charge on the first spiky, then you won't have time to charge a second. You're going to need to fire a missile diagonally up at him when you get close. You don't need to recharge if you do. But if he moved up, or the first one moved left, you can just charge spin into him and save yourself a missile. Which I highly recommend, as missiles are going to become scarce.
Now, although those spikys were annoying, they weren't random factors, as anything they did, we could counter. However, now there IS a random factor. There's 2 puffers in this room, the first one becomes an issue now.
If the first puffer moved down/right, he's going to be right in the middle of the passage you want to currently be going into. Start over. You can't do anything about it. The good news is, If he moves in the other 3 directions, we CAN do something about it.
If he moved down/left or up/right, he'll never even get close to you. You may go about your merry way. If he moved up/left, which was the case in my video, that's okay too, just fire off a missile diagonally at the point after your wall jump that I did in mine. It'll hit him and the puffs will clear by the time you get there. This is why you jumped high off the wall, so you'd be in position to fire this missile if you needed to.
Now, the third spiky tyke. If he went up, he's going to be a problem. You can charge your beam and spin into him (do this fast, a lot easier if you didn't have to fire a missile just now). If he went down though, you'll be able to see that, as in my video, and you'll know you don't need to bother with him. So if he goes up it's annoying, but it's not a restart.
Unfortunately the same cannot be said for the second puffer.
I'll be blunt. This puffer sucks. If you want to get by this guy without slowing down, you have a 50/50 chance of having the POTENTIAL to do that.
There is no such thing as "not in the way" with this puffer. He is always in the way. Now if he moved down, you got no hope. Restart. Down/right put him right in the middle of where you want to be jumping to. If he was down/left, well he'll be on top of you before you even get to do your wall jump, probably.
Your only hope is for him to move up. The worse of these scenarios is up/right. If he moved up/right, he's going to be coming down at you diagonally from the left by the time you get to the topmost platform of this room. This was the case in my video.
The only hope you have of getting through without slowing down in that case, is if you were very fast getting up here. Then you'll be able to run under him before he gets so low that he hits you. That's, again, what happened in my video.
The better of the two possibilities is if he moved up/left. In this case, when you get to the platform, he is going to be right at the door. To kill him without slowing or getting hit in this case, you will have to employ a strategy I call... oh.... the shoot missile strategy. Yeah, I couldn't come up with anything better.
The premise of the srategy is this: A puffer, when hit, will shoot off puff clouds which hurt. However, if hit again, it cannot puff again, until the first puff clouds go away.
Now in the case of this puffer being by the door when you get there, you could fire a missile to destroy him, but missiles go slow. In fact, you'll practically be outrunning your missile for the first half of the distance. You will reach the puffer shortly after the missile, and you will be hit by the clouds.
There is another option, however. A normal beam shot will go much much much faster than a missile goes. As soon as you are on your feet on the platform (hopefully you landed as left as you could) you will fire a normal beam followed immediately by a missile.
The normal beam hits the puffer, causing him to puff while you're still a long ways from him. Then the missile destroys him, before the puff disappears, preventing him from puffing again. THEN, by the time you get to the puffer, the puff is gone. Ingenious, no?
And yes, this IS still the best case scenario for that puffer. It's hard to get up this room fast enough to run under the first case.
And oh yeah, be sure to charge your beam on the way out.
Now then. In retrospect, there's a lot of crap that can go wrong in this, the D room. The puffer at the top has a 50/50 chance of forcing you to restart, and a 50/50 chance of just plain being difficult. But, if somehow, against all odds, you manage to get through this place, you are rewarded with...
C: An easy room! Thank heavens! Shoot diagonally down to kill the wormy in your way. Then leave, make sure to charge.
B: Alright, you're almost done! The last room with random factors. Most likely, if you used up all your luck getting to this point, you're not going to get any further. Keep at it though, or it won't be worth making this little jaunt it's own segment!
Now, remember that shoot missile strategy from room D? That's going to be the bread and butter of this room. You have two puffers to deal with on the bottom, and corridors too narrow for them to be anything but in your way. You'll need to take them out.
Alright, first thing's first, the wormies. You take them out with charge shots like in my video, capice?
Now, onto the REAL issue, puffer #1 down there.
If he moved down/right, he bounces off the floor and is moving up when you get to him. You can run under him. The only thing is you have to drop straight down rather than holding left as you fall down to the floor from the platform. Being forced to do that loses maybe a third of a second, certainly nothing I'm losing any sleep over.
If he moved up/left, you're going to need to do the shoot-missile strategy to take him out without getting hit or slowing. You don't have to lose that third of a second with this one, so it is the best contingency. This is what happened in my video.
If he moved down/left, you're sunk. No way to hit or kill him until you get so close, that you get hit yourself. Start over.
If he moved up/right, you're also sunk. He bonced off the celing and is in the middle of where you need to be, and moving down. Again, no way to hit or kill until you get close. Start over.
So to recap, your recent victory over that horrible 50/50 puffer in the D room will probably be screwed up by this 50/50 puffer. But if somehow you manage to not only get 2 of the 4 good possibilities on this puffer, but manage to act on them to not slow down, the good news is this is the last random factor that can force a restart!
Puffer #2 is actually pretty mellow. Of the 4 possible movements, only one is tough to counter. And all 4 can BE countered.
Get this: If he moves anything but down/right, you do the same thing for all 3 possibilities. You fire a missile straight ahead as you're dropping off the ledge. It'll hit him. Simple, no? His height only changes a slight bit between the 3 variations, but it does change, so make sure you fire right about where I fired, and it'll hit each of them.
Now, the down/right possibility is tougher. What you're going to do, is as you're approaching the edge of the ledge, you need to fire diagonally down. Then, after you fall from the ledge, fire a missile straight across into him. The first shot caused the puff and the second destroyed him, as usual.
All that's left is wormies. Missile the one on the ground, and use your charge on any others in the way. You're almost finished! Make sure you land as far right on the top platform as possible, to start a boost, and charge on your way out of course.
A: Ha, f00led y00! Bet you thought you were through the worst of it, eh? Well after all that randomness, now you have a skill test between you and the exit. You can build a shinespark by the time you get to the door, but you'll have to take out AALL the flies without slowing down. Well, all the ones in your way, and there's 4.
Remember that stuff last segment with the swoosh animation, and it's ability to take flies out? Yeah, use that here. As soon as you come up to the first fly, fire your charge shot straight ahead, and the swoosh takes him out. Then rapidly fire a few shots off.
The rest of the charged shot takes out the second fly, and those rapid fire shots take out the third fly. As for the fourth fly, you'll need to be quick with a missile. Then crouch for your shine at the end of the line.
It occurs to me I've been using the word "charge" to refer to both charging a shinespark as well as charging your beam. Bad Sess! A scientist should know better. That could cause confusion. Alright, from now on, 'charging a shinespark' will simply be known as Shining. Sparking will refer to the VWWWOOOOOSSHHSHSHSHHSH that comes after you get a Shine. Charging will only be used in reference to your beam. There, that's better.
That's about it. Of course if you want to skip the whole final shinespark bit after getting all the random factors to go right, by all means don't feel you need to do it. It's more show than speed, as is the whole of my run, after all.
If you did get a spark though, just do what I did in the video. Spark against the slope into a boost in the recharge room, on through to the nav room, crouch to shine again when you're on the computer platform. This will do the same thing as happened back in the serris segment with the pump station. The computer stops time, so once the babbling stops, you can spark to the left again. You'll need to jump before the door to land on the elevator. That's about the size of it.
Sparking won't be useful at the beginning of ARC, so you can (mercifully) save AFTER the computer this time. :21 on the clock! If I had any doubts about making this its own segment, not anymore.