Metroid Fusion 1% Run
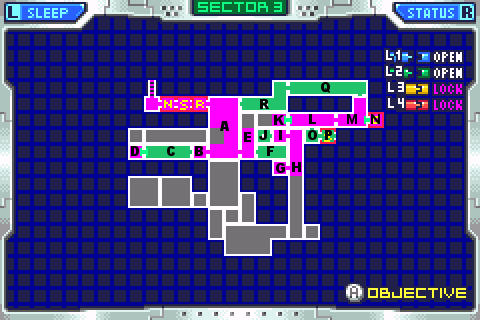
Behold the mighty reference map, and all it's glory.
BOX
Ah, I was looking forward to this one. One of my favorite things to do is sit down with a boss and figure out a showy way to murderize him. Not to mention a quick way. And I must say I'm particularly proud of what I came up with. The battle just looks so... smooth, I dunno. But I'll go into more detail...
O: Up and ATOM
L: No boss door! I'm so happy *sniff*. This more than anything probably contributed to me getting this segment done fast. No random factors = Happy Sess.
M: Aaand the star of the show! Let's talk about BOX a while.
As you would expect of a robot, he is 100% non-random, which means I like him. BOX kicks giant plant's ass. But to the point, BOX's movements depend entirely and completely upon your movements. In other words, you can control him!
As for how to control him to our advantage. Well BOX takes 10 missiles to kill. Right between the... uh, whatever those things are, right in his center.
If you are close to box, he will hunker down and shoot a fire bomb towards you. While the fire bomb is exploding, you are in a very very bad position to do any kind of shooting at box without risking being hit yourself. Also, while firing the bomb, box is invincible.
So, put simply, we want to make that not happen. If we can keep it from happening altogether, then by all means, that's super.
And there's one more thing we're going to want to control. BOX, though not an X, does have a sweet spot. When you defeat him, he will walk (very very SLOWLY I might add) to the right, before leaving the room and giving you a way out.
Obviously, you want to kill him when he's on the right side of the battlefield.
To do these things is to have a fast BOX battle. Now as for how to do that, BOX only really does three things: he jumps, he fires bombs, he walks.
He walks when you are very far away from him. He jumps when you are kind of far away from him. He fires bombs when you're not at all far away from him.
Pretty easy, eh?
Well with a bit of tweaking and a lot of practicing, I managed a series of movements which allows you to force him into a pattern of constant hopping, while you shoot him 10 times in his center, and he dies on the right side of the screen. It's hard to explain, very hard to explain actually, but the video speaks for itself.
Basically, You shoot diagonally down, and if done at the right time, BOX hops into your missile. What your movements consist of is move left a lot, quickly shoot diagonal down right (do it by holding down/right on the d-pad, not hitting L, for L will prevent you from moving across the ladder if you don't let go of it fast enough) and repeat.
It's a simple concept, the only trickiness comes in the timing of when you fire your missile. You just have to get it so each shot connects. All it takes is getting into a rhythm, which is just a matter of practice.
After your fourth shot, you will move right immediately after rather then left, then repeat the same thing, just shooting down/left and moving right, rather than the other way around. After two shots more, you will need to stop, using the back background as reference to determine exactly where it is you should be stopping, and fire straight down until BOX is dead. I used that little circle thingy in the back background, that's in the perfect spot, and samus moves right over it.
That's about the size of it. BOX walks right and drops rubble. Now the rubble doesn't actually exist until it hits the ground, so if you want to save time, feel free to jump before then so you land on it right as it becomes solid, same as I did.
The wall jumps out save time too, not to mention look really awesome, but they don't save as much time as doing the BOX stuff perfectly, so if you do manage a perfect BOX fight and don't want to muck things up, feel free to skip it.
Q: Ah yes, one missile left. That's going to be a problem later. I did a bit of missile inventory here, and figured I'm going to need to have 2 missiles to keep from slowing down in the next room. So what I do is use my final missile, carefully firing it at the right moment, using the background (and foreground, namely the pipe) as markers, I kill a hoppidy far off screen, and arrive just in time to pick up the x parasite he leaves. Remember, this is a no-hit game, so the refills are always missile.
And I get my refill, and I boost on through, and next room
R: Not a bad room, just one you have to be prepared for. Get a spark from your boost when you come out the door, then drop down and spark left to hit that block that you would otherwise have had to morph and bomb to destroy.
Now on the other side of that block are two hoppidies who will each require one of your two missiles. If the first one decides to hop right, you'll have to be fast to get him before he gets you. Then bomb your way out and off you go. Lay the bomb early as you can, so it explodes early and you can get out early.
A: Unmorph and fire and run left and charge. A charge-spin will take out the weird... thing up there, so make sure to do that. Then it's time to save again. Joy! Once again, we must save before the computer, because in the next sector (NOC) we're going to need a shinespark by running through the save point at the start.
And :17 on the clock. Couldn't ask for less.